If you run a WordPress blog, the main job is simple: use one BlogPosting JSON-LD block on each single post, make it match the page, and test it before and after site updates.
I’d boil the whole article down to this:
- Use
BlogPostingfor most business blog posts - Use JSON-LD in the page
<head> - Pull fields from WordPress, not static text
- Match the visible page for the title, author, dates, image, and URL
- Keep images at least 1,200 px wide
- Format dates in ISO 8601
- Use
Personfor authors andOrganizationfor publishers - Keep schema on single post pages only
- Avoid duplicate schema from both a theme and plugin
- Test with Google Rich Results Test and Schema Markup Validator
Here’s the short version: schema does not move rankings on its own, but it can help a post qualify for rich results that may show the author, date, or image. That means small setup mistakes - like a missing image, wrong date, or duplicate markup - can block eligibility fast.
A few facts stand out:
- Google recommends article images that are at least 1,200 px wide
- A
headlineshould stay at about 110 characters or less datePublishedanddateModifiedshould use a format like2026-06-13T09:00:00ZNewsArticleis the type tied to Top Stories, not standard blog content
If I were checking a WordPress site today, June 13, 2026, I’d look at four things first: the schema type, the featured image size, whether the author and publisher are set up right, and whether only one primary BlogPosting block appears on the page.
That’s the whole playbook in plain English: pick the right schema type, map WordPress fields cleanly, keep the markup in sync with what users see, and re-test after any plugin, theme, or core WordPress change.
The BlogPosting Properties You Need to Get Right
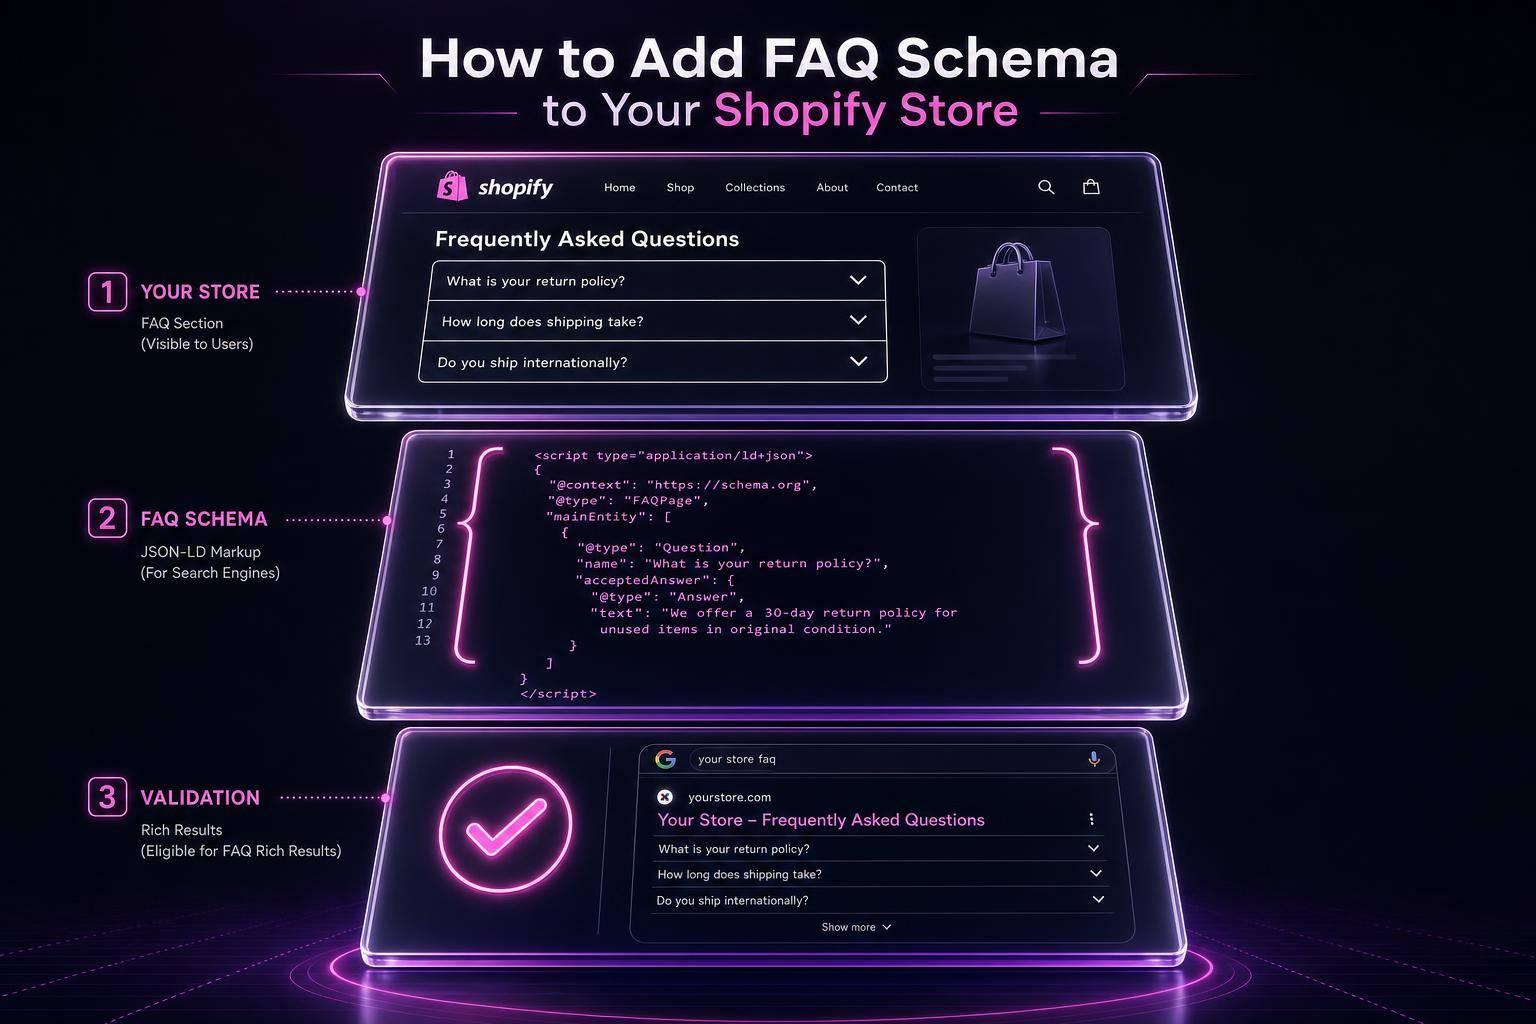
Every BlogPosting block starts with @context and @type. Those two fields tell search engines which schema vocabulary you're using and what kind of page they're looking at. For those new to the concept, understanding schema markup for beginners is the first step toward better search visibility.
After that, the big rule is simple: your schema should match the page. If the byline, date, or image in your markup doesn't line up with what's visible to readers, you can run into trust and validation issues.
Here’s how the main properties line up with data WordPress already stores for each post:
| WordPress Field | Schema Property | Requirement |
|---|---|---|
| Post Title (H1) | headline |
Max 110 characters; should match the visible title [1][4] |
| Featured Image | image |
At least 1,200px wide; 1:1, 4:3, and 16:9 ratios are preferred [1][4] |
| Publish Date | datePublished |
ISO 8601 format (for example, 2026-06-13T09:00:00Z) [1][4] |
| Updated Date | dateModified |
ISO 8601 format; update it whenever the content changes [1][2] |
| Post Permalink | mainEntityOfPage |
Use the post's canonical URL, ideally as the @id of a WebPage entity [1][4] |
| Author Profile | author |
Person or Organization with name and url [1][3] |
| Site Identity | publisher |
Organization with name, url, and logo [1][4] |
dateModified is one of those fields people skip all the time. That’s a mistake, especially for evergreen posts. If you update the article, update the schema too.
How to Map WordPress Post Fields to Schema Properties
Pull these values straight from WordPress functions. Don’t hard-code titles, dates, or URLs. If you're using SEO plugin fields or adding a custom JSON-LD snippet in your theme, the source should still be WordPress data, not static text.
That matters for one reason: it keeps the markup in sync with the page. Change the title in WordPress, and headline should change too. Update the post, and dateModified should reflect it.
Once that mapping is clean, the next job is figuring out how WordPress should output the markup.
Author and Publisher Setup for Single-Author and Brand Blogs
The author property can use either Person or Organization. For most WordPress blogs with a named byline, Person is the right pick because it points to individual expertise [2][3].
For author.url, link to the WordPress author archive page, like https://yoursite.com/author/sarah-mitchell/, or to an official social profile. You want to give search engines one clear place to check who that author is.
For publisher, use Organization every time - even if one person runs the site. The split is pretty straightforward: the author is the writer, and the publisher is the brand behind the site. Include the organization’s name, site URL, and a logo as an ImageObject. It also helps to use one steady @id across the whole site, such as https://yoursite.com/#organization. That kind of consistency helps Google tie your brand to one entity in its Knowledge Graph [1].
If a post has more than one author, use an array in author. Each contributor should get their own Person entry with a name and URL.
With that entity setup in place, the next step is generating the JSON-LD in WordPress.
sbb-itb-f4b2e1b
How to Add BlogPosting Schema in WordPress
Once you've mapped the properties, the next step is deciding how WordPress should output the JSON-LD. In most cases, you have three paths: a plugin, custom code, or an audit tool. No matter which route you take, keep BlogPosting on single post pages only. Pick the simplest option that fits your site, then validate the output before you publish.
Use a Plugin for Default BlogPosting Output
An SEO plugin is the fastest way to add steady BlogPosting markup. In the plugin settings, look for Titles & Meta or Schema Settings and set the default schema type for Posts to BlogPosting.
You should also set your site identity as either a Person or Organization. That gives the plugin what it needs to fill in publisher the right way.
Then check one live post and make sure these fields are present:
headlineimagedatePublisheddateModifiedauthorpublisher
Use code if the plugin output feels too generic or if you need custom logic.
Add Dynamic JSON-LD in Theme Templates or Code Snippets
Use theme templates or code snippets when you want full control. Pull live WordPress values for the title, permalink, dates, and featured image so the schema updates on its own.
Also, wrap the output in an is_single() conditional tag. That keeps the markup off archive and listing pages, which is exactly what you want.
If you want a quick check before publishing, audit the generated JSON-LD next.
Use Schema Validator AI to Generate or Audit WordPress BlogPosting Markup
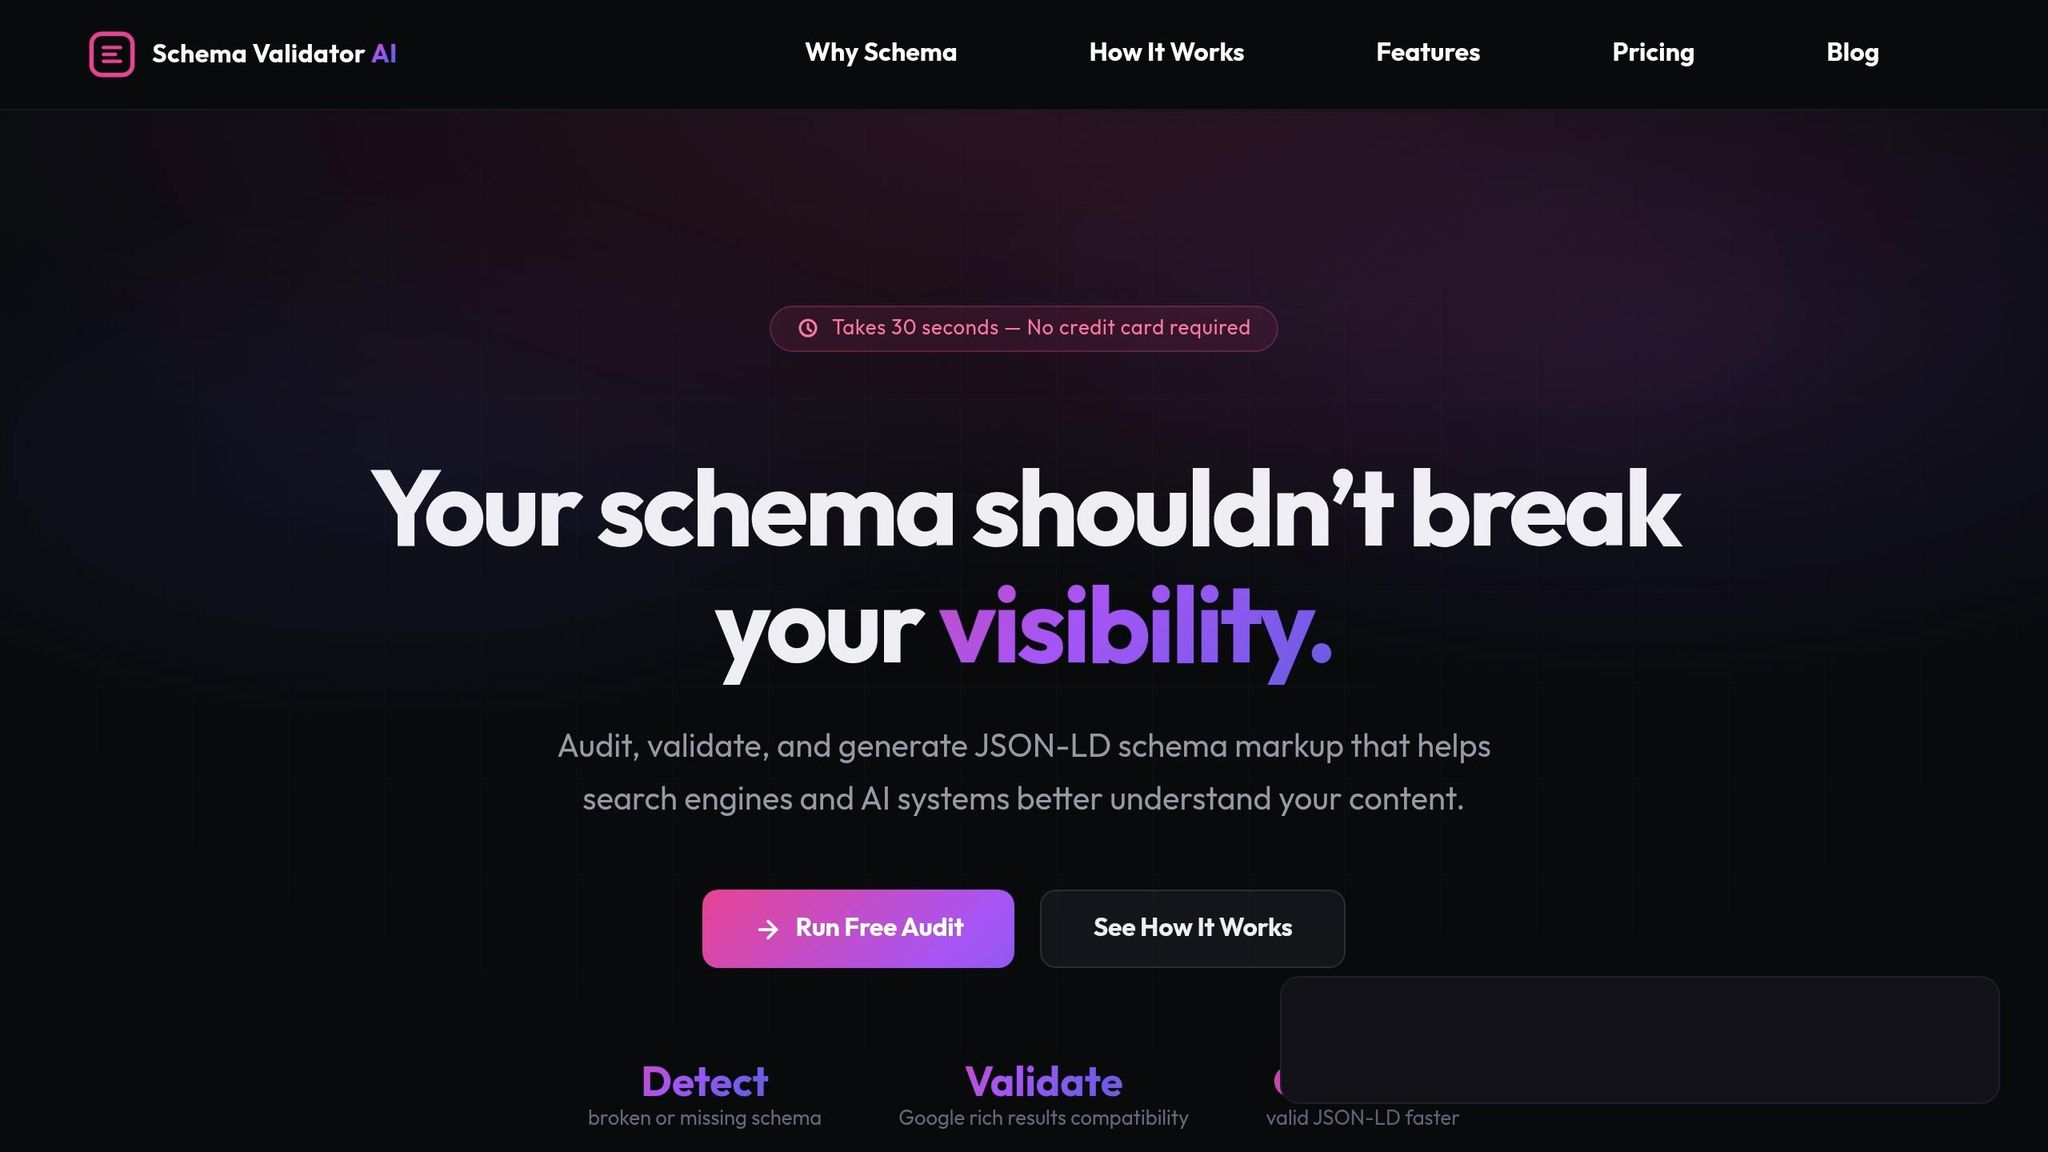
Schema Validator AI lets you paste in a post URL and check for missing BlogPosting properties, formatting problems, and compatibility with Google Rich Results. You can also use the generator to create clean JSON-LD, then paste it into a Custom HTML block for that specific post.
After that, test the markup with Google's validators.
How to Validate, Debug, and Maintain Your Schema
WordPress BlogPosting Schema: Common Errors & Fixes at a Glance
After you generate BlogPosting JSON-LD, validate it before it goes live. Then test it again after any theme, plugin, or WordPress update.
Check Eligibility with Google Rich Results Test and Schema Markup Validator
These two tools do different jobs. Using both gives you a better read on what’s happening.
The Google Rich Results Test (search.google.com/test/rich-results) shows whether a post is eligible for Google rich results and gives you a preview of how that result may appear [3][4].
The Schema Markup Validator (validator.schema.org) checks your markup against the broader Schema.org vocabulary. That helps you confirm the structure is correct beyond Google’s own rules [1][3].
Don’t stop at testing one post. Check a few sample posts from across your site.
Also, watch Google Search Console’s Enhancements → Articles report for "Unparsable structured data" errors after updates [3].
Once your markup passes validation, fix the issues most likely to block eligibility first.
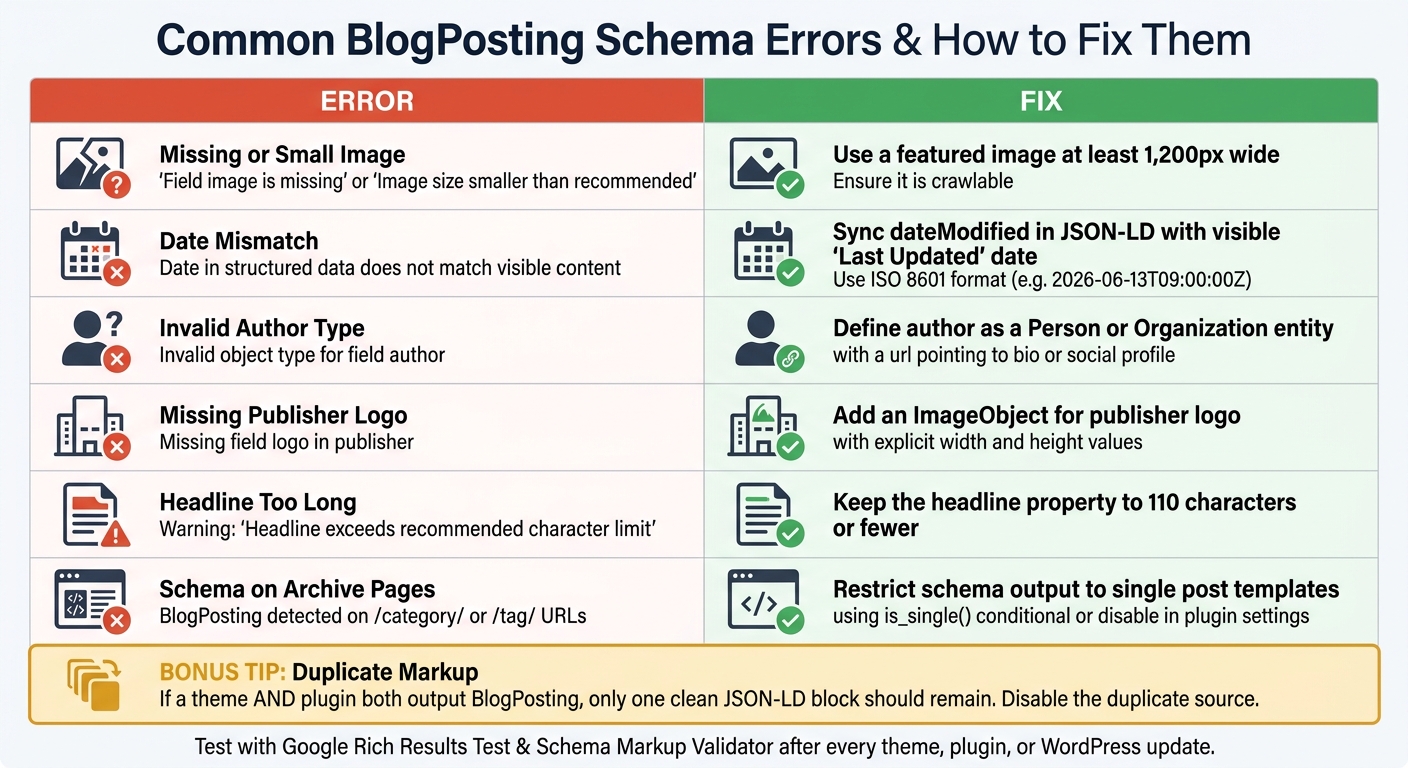
Common BlogPosting Errors and How to Fix Them
Most BlogPosting problems on WordPress sites come from the same small set of issues. Here are the ones that show up most often and what to do about them.
| Issue | How It Appears in Tools | Resolution Steps |
|---|---|---|
| Missing or small image | "Field 'image' is missing" or "Image size smaller than recommended" | Use a featured image at least 1,200px wide and make sure it is crawlable [1][4]. |
| Date mismatch | "Date in structured data does not match visible content" | Sync dateModified in your JSON-LD with the "Last Updated" date shown on the post, and use ISO 8601 format [3][4]. |
Invalid author type |
"Invalid object type for field 'author'" | Define the author as a Person or Organization entity, and include a url pointing to an author bio or social profile [1][3]. |
| Missing publisher logo | "Missing field 'logo' in 'publisher'" | Add an ImageObject for the publisher logo with explicit width and height values [1][4]. |
| Headline too long | Warning: "Headline exceeds recommended character limit" | Keep the headline property to 110 characters or fewer [1][4]. |
| Schema on archive pages | BlogPosting detected on /category/ or /tag/ URLs |
Restrict schema output to single post templates using the is_single() conditional, or disable schema for archive pages in your plugin settings [1][3]. |
One problem deserves extra attention: duplicate markup.
This happens a lot on WordPress sites. A theme may output BlogPosting, and an SEO plugin may do the same thing. If a validator shows two separate BlogPosting blocks on one page, track down the extra source and turn it off so only one clean JSON-LD block remains [3].
Treat schema checks like part of your normal update routine. Theme, plugin, and WordPress changes can break markup, so retest right away after each update [3].
Advanced Best Practices and Final Checklist
Once your core BlogPosting schema is live and validated, a few higher-level choices make the difference between markup that simply works and markup that stays accurate over time. At this stage, the fields most likely to drift are usually images, canonical URLs, and any extra schema you nest into the page.
How to Handle Images, Canonicals, and Nested Schema
These are usually the last pieces that trip up otherwise valid BlogPosting markup.
Images: Use the same image URLs in your schema and in the post template. When those URLs match, there’s less chance of a mismatch between what the schema points to and what the page actually serves.
Canonical URL: Set mainEntityOfPage to the post’s canonical URL. In WordPress, the permalink is the source of truth. For multi-page posts, point mainEntityOfPage to the canonical version and connect series posts with isPartOf [1][3].
Nested schema: Add only schema types that match visible parts of the page, such as FAQPage or HowTo. Mark up only content users can see, and avoid duplicate schema blocks [1][4].
Final Checklist: The Non-Negotiables for WordPress BlogPosting Schema (or use a broader schema markup audit checklist for site-wide health)
Use this as a quick reference before a post goes live or after a major site update:
| Checkpoint | What to Confirm |
|---|---|
| Schema type | One primary BlogPosting block on blog posts; no duplicate Article or NewsArticle block unless the page actually needs it |
| Field mapping | headline, datePublished, dateModified, author, and image match the visible post content |
| Image size | Image is at least 1,200 px wide, with 16:9, 4:3, and 1:1 versions when possible |
| Canonical URL | mainEntityOfPage points to the post’s canonical URL |
| Author entity | author includes a unique URL for disambiguation |
| No duplicates | Only one primary BlogPosting block appears on the page, with no conflicts from themes or plugins |
| Validation | Test with Google Rich Results Test and Schema Markup Validator |
Retest after theme, plugin, or template changes so the markup stays aligned with the page.
FAQs
When should I use BlogPosting instead of Article or NewsArticle?
Use BlogPosting instead of Article or NewsArticle when the content sits in a blog section, has a named human author, and uses a conversational or opinion-based tone.
That gives search engines clearer context that the page is a blog post.
How do I avoid duplicate BlogPosting schema in WordPress?
Use only one BlogPosting schema block per page or post. If you stack markup on the same piece of content - like plugin output plus your own JSON-LD - you can run into overlap and conflicts.
If you're using plugins like Yoast SEO, Rank Math, or Schema Pro, set them up so each post outputs a single schema block. It also helps to avoid multiple JSON-LD blocks for the same page and not mix types like Article and BlogPosting on one post. Check your markup on a regular basis to catch conflicts before they turn into a mess.
What should I do if my post fails rich results validation?
First, find and fix the errors with Google’s Rich Results Test or the Schema.org Validator. Then run your schema through validation again to make sure it meets Google’s requirements.
You should also keep an eye on structured data performance in Google Search Console under Enhancements. That’s where you’ll spot new issues, warnings, or markup problems before they turn into bigger headaches.
Regular validation and monitoring help you keep rich result eligibility and reduce the risk of SEO problems caused by invalid schema.